Want to simplify interaction with your customers and create a private environment?
By the end of this guide, you will be able to set up your own secure, efficient and user-friendly customer portal.
We are going to talk about the following topics:
- The benefits of a customer portal
- How to set up a portal with a free method
- Additional options for those seeking more functionality
Ready to improve your customer experience? Let’s get started!
Why create a customer portal?
A customer portal is an essential digital tool that acts as a central communication and information platform for both companies and their customers. This portal serves as a single, accessible location where essential information such as project updates, messages, and documents are systematically organized and stored. This reduces the common confusion and clutter typical of traditional e-mail conversations. This results in streamlined communication, significantly reducing misunderstandings and information loss.
Take a digital marketing agency, for example. Through a well-designed client portal, the agency can effortlessly share real-time SEO reports, detailed campaign strategies, and project timelines. Clients, in turn, can view these documents, provide feedback, and even direct approvals, all within the same system. This not only increases transparency, but also improves collaboration and overall client satisfaction.
Another crucial benefit of a customer portal is the enhanced security it provides. At a time when data security is paramount, customer portals provide a secure environment for exchanging sensitive information. Protective measures such as SSL certificates, data encryption, and regular security audits help keep confidential information protected from unauthorized access and cyber threats. For example, in a legal office, lawyers can securely share case files, legal documents and court hearing schedules with their clients. This ensures that sensitive information remains secure while also being easily accessible to the parties involved.
The customer portal not only eliminates the day-to-day challenges of business communication, but it also builds a layer of trust and confidentiality that is highly valued by customers. It enables companies to provide professional, efficient and customer-oriented service, which is essential in today’s competitive business environment.
How to create a free customer portal
Setting up a customer portal within WordPress can be a very cost-effective solution, making it accessible to businesses of all sizes, even those with limited financial resources. While there are paid options available that offer advanced features and support (which will be discussed in more detail later), starting with a free version is an excellent starting point for businesses just getting started or those on a tight budget.
Here is a comprehensive guide with the steps to set up a basic customer portal in WordPress without having to make an immediate financial investment:
Step 1: Install and activate the plugin
The plugin we are going to use here is WP Customer Area. I will explain more about this plugin later in the free options section.
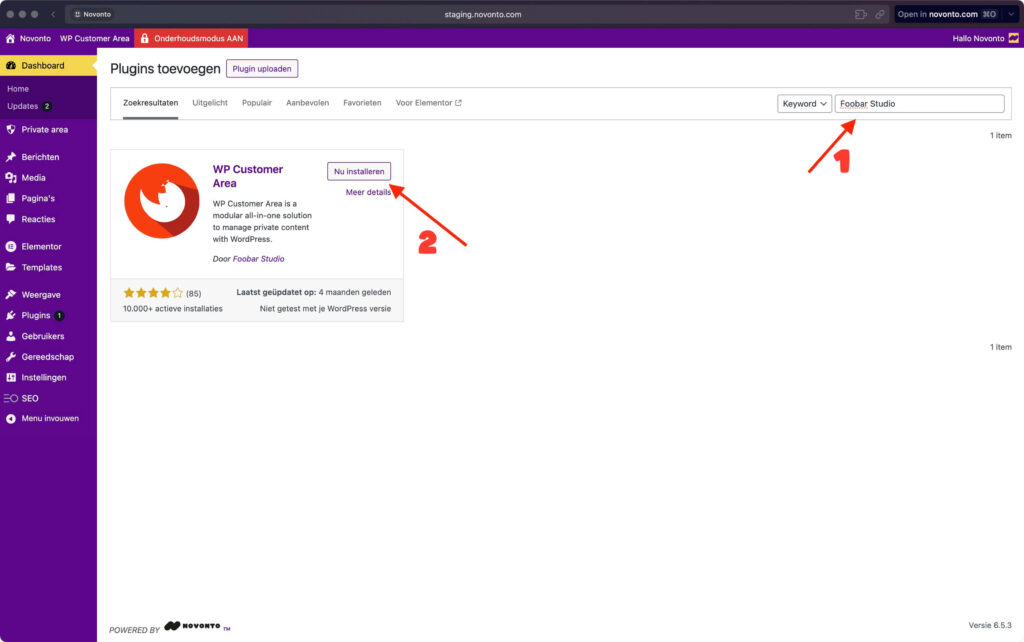
Go to the ‘Add new plugin’ page in the admin dashboard:
- Search for the plugin “FooBar Studio“
- Install and activate the plugin
Step 2: Creating pages
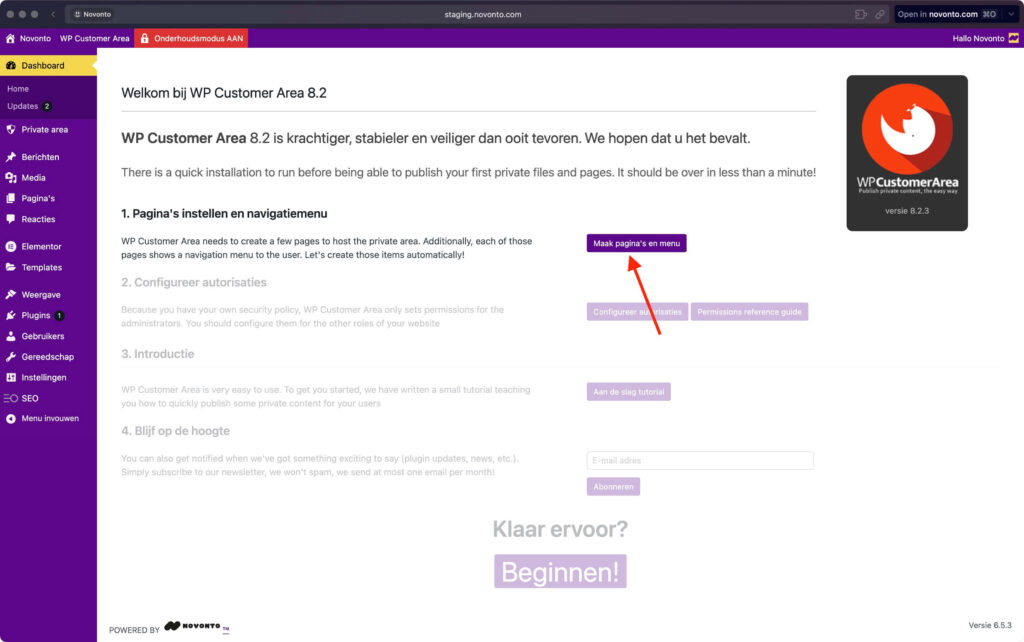
After activating the plugin, the installation wizard will start.
All you have to do is click on the “Create Pages and Menu” button:
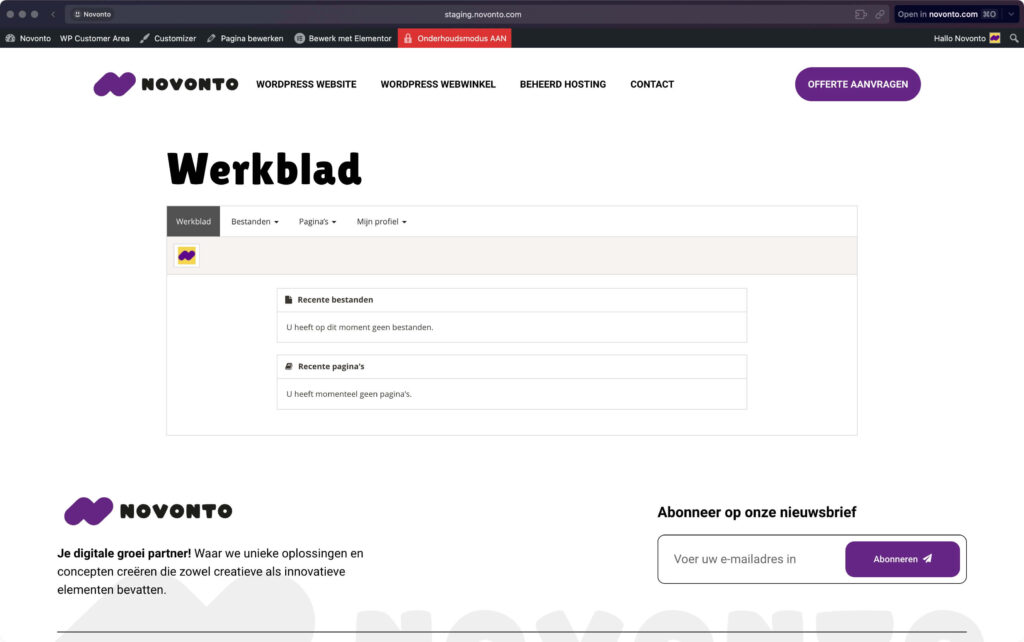
This creates several pages, such as the following:
- Worksheet
- Files
- Pages
- My Profile
Here is an example of a page that has been created:
In addition to creating pages, the plugin will also create a menu. If you want to check this, you can go to Display > Menus in the WordPress dashboard.
Step 3: Configure the Permissions
Back to the installation wizard, the next step is to click on the button Configuring permissions to click
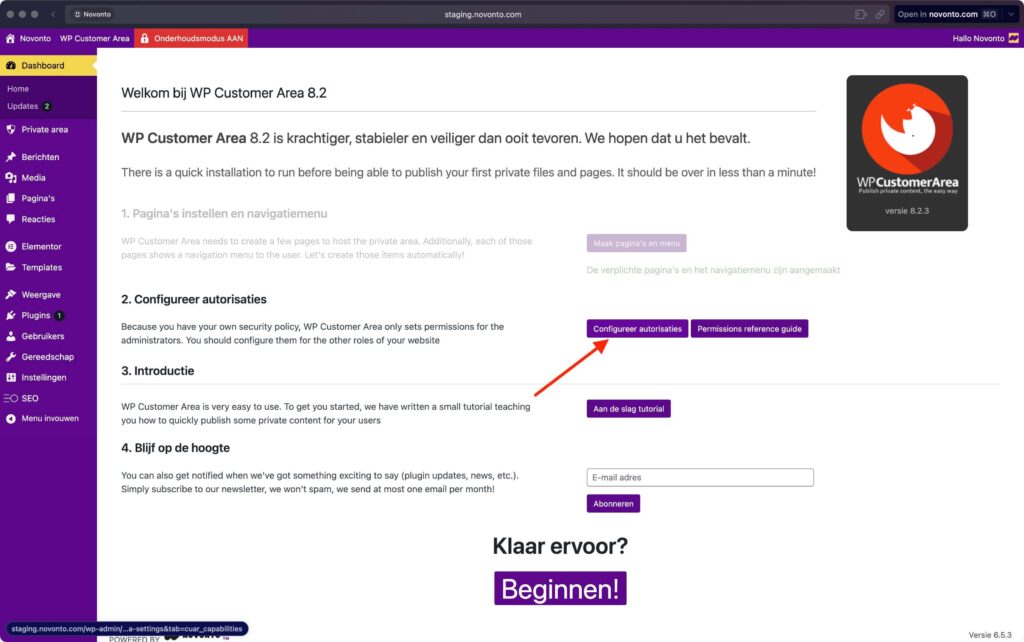
The plugin will only set the necessary permissions for site administrators. For the rest, you have to assign them yourself.
After you click on the button, the plugin will take you to another page where you can change the Modify assigned permissions for other users.
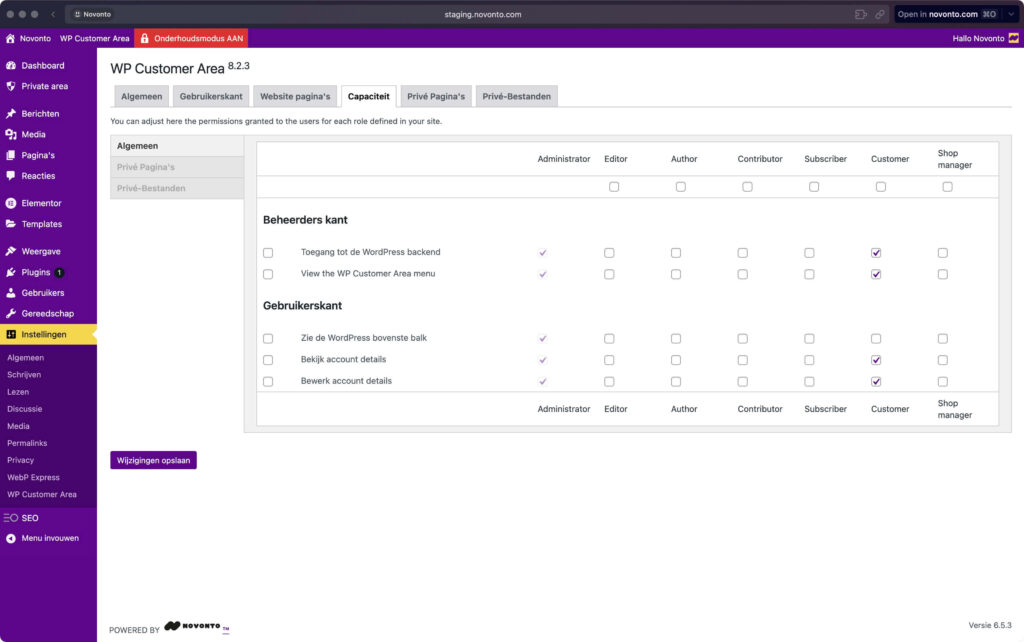
Be sure to make the changes save After you finish adjusting permissions.
⚠️ Note: You do not need to set permissions for every role listed – only for the roles you currently have or assign. It is also important to note that there are three permissions tabs: general, private files and private pages.
Step 4: Create a Customer
Your customer portal is now ready. But before you include customers in it, it’s important to make sure everything is set up correctly.
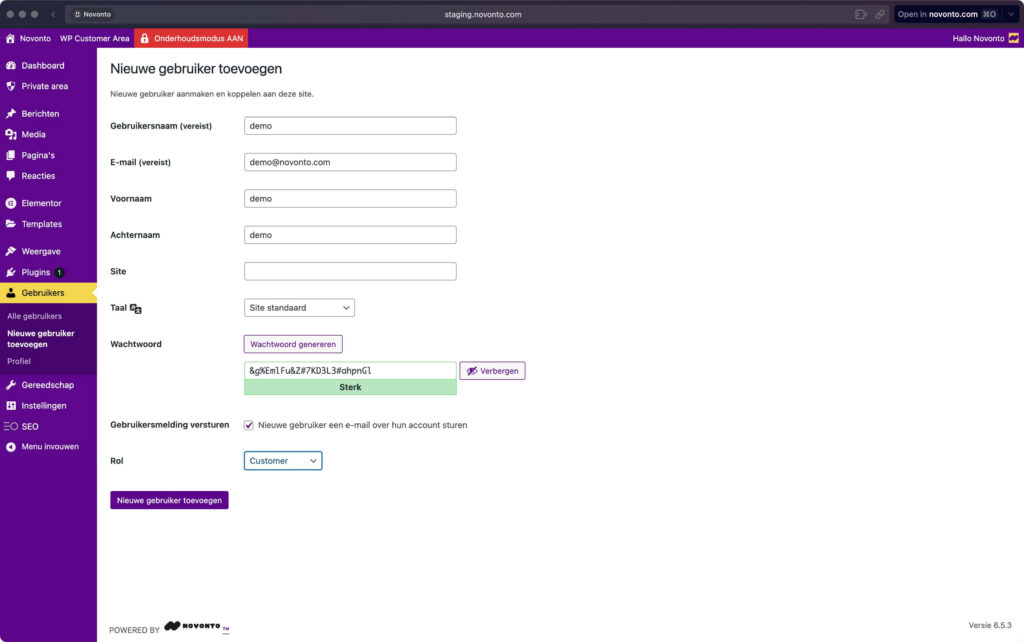
Let’s start by creating a fictitious customer user:
- Go to users > add new from the admin dashboard
- Fill the data in for the new user
- Click on the button add new users
Step 5: Upload a Demo Private File
The next step is to create a private file for the demo client:
- Move your mouse over the WP Customer Area in the top toolbar
- Go to Files > New file
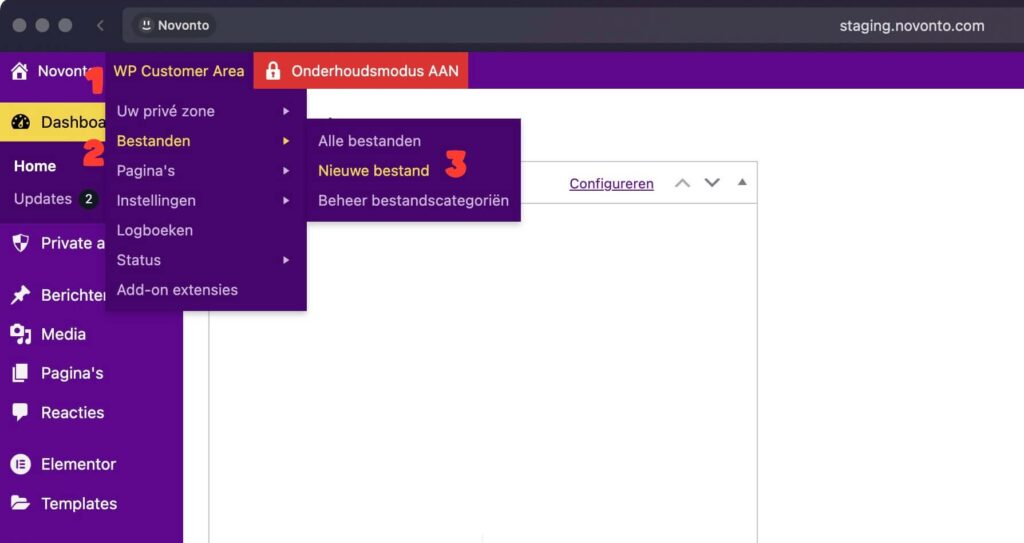
You can also go to private area > files go into the side panel of the administrator dashboard and add a new private file there.
This takes you to a page similar to the page where you create a product in WooCommerce:
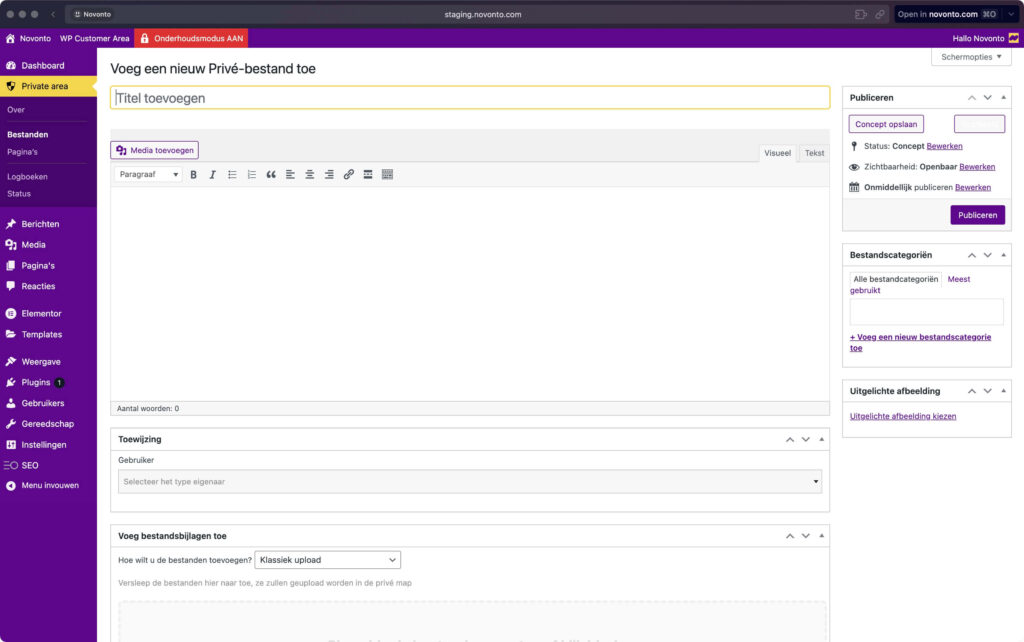
By the way, when adding a file for a specific client, don’t forget to specify the user assignment:
- Click on the drop-down menu
- Search/select the user
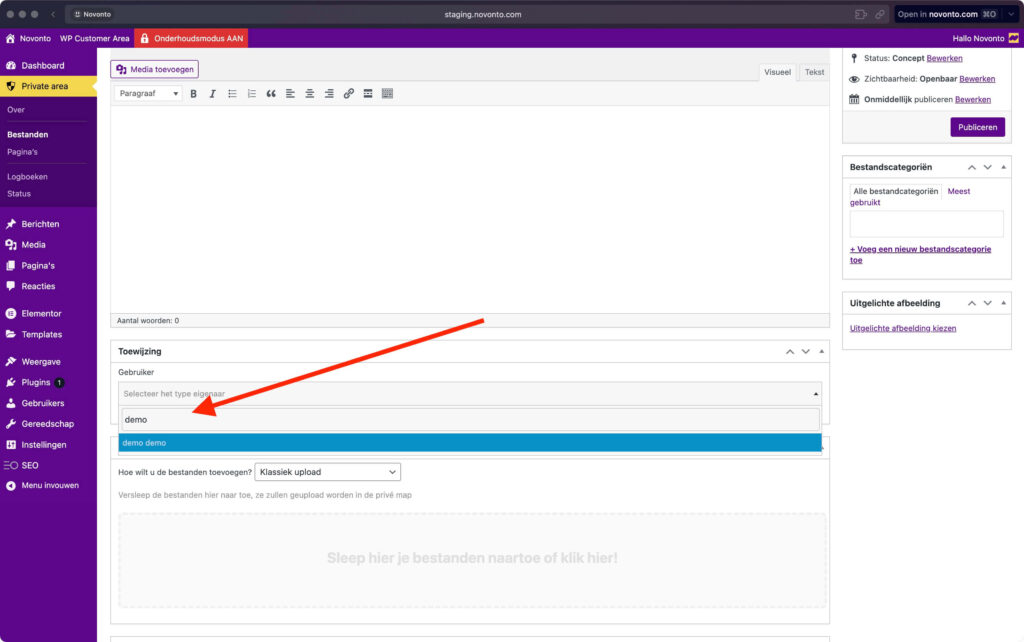
For easy management, it’s helpful to create file categories so you can organize files based on what they are or their uses.
This would be especially useful if you work with different types of files in your client projects.
Step 6: Create a Private page
Another essential component to test is creating a private page.
These pages can contain detailed information about your processes, your terms of service or other information your customers need to know.
For this:
- Move your mouse over the WP Customer Area in the top toolbar
- Go to Pages > New page
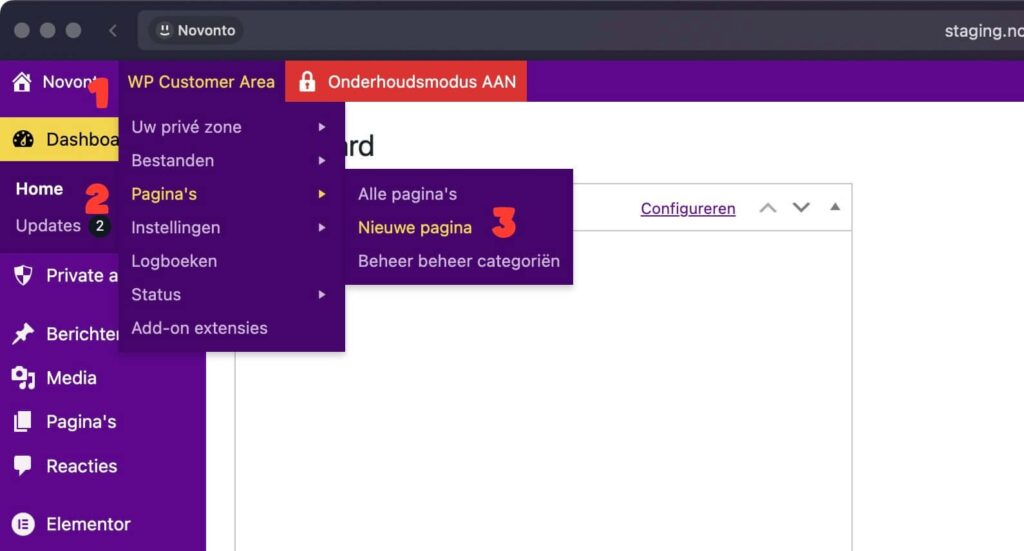
The editor is similar to that of adding a new private file. If the page is for a specific user only, be sure to indicate this in the assignment box.
For demonstration purposes, I use a generic template for terms of service:
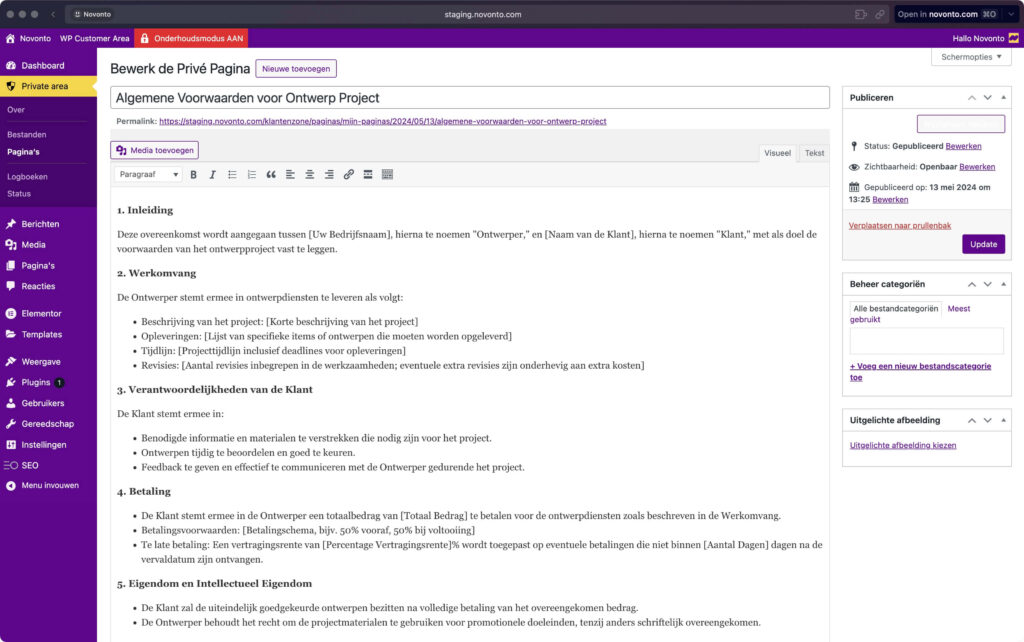
As with pages/messages published through WordPress, you can allow/disallow comments, post an excerpt, change who the author is, and more.
Step 7: Test the Customer Portal
Now is the time to test the customer portal and see what it looks like from your customer’s side:
- Open another browser or go to incognito mode
- Log in to the website with the demo customer data
The demo client details refer to the details you entered in Step 5.
The Worksheet is the first thing they would see:
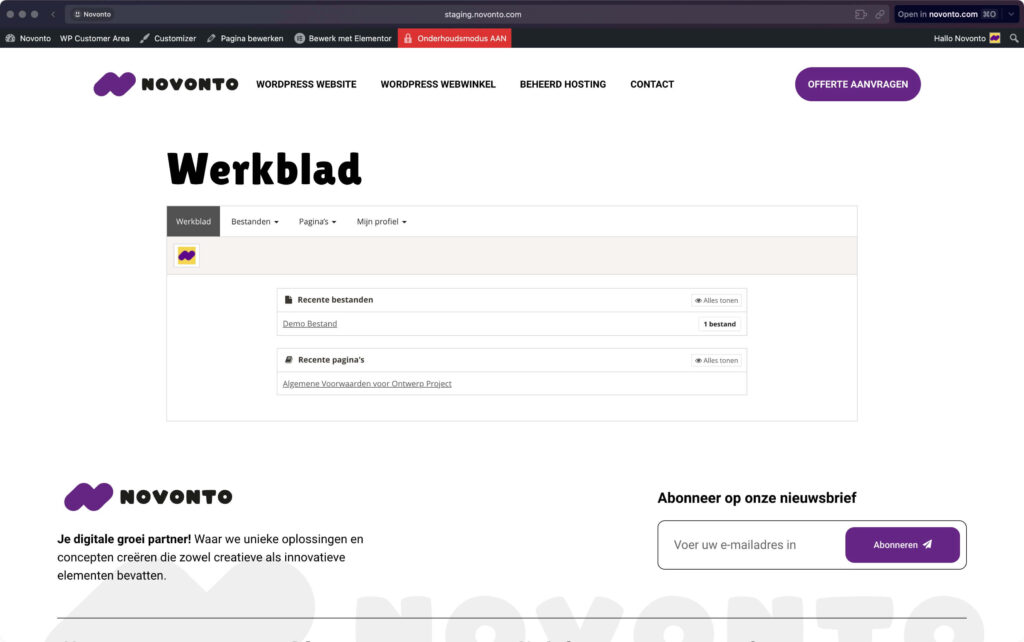
From there, you can go ahead and click on the newly created file and page.
Starting with the file, this is what your client would see:
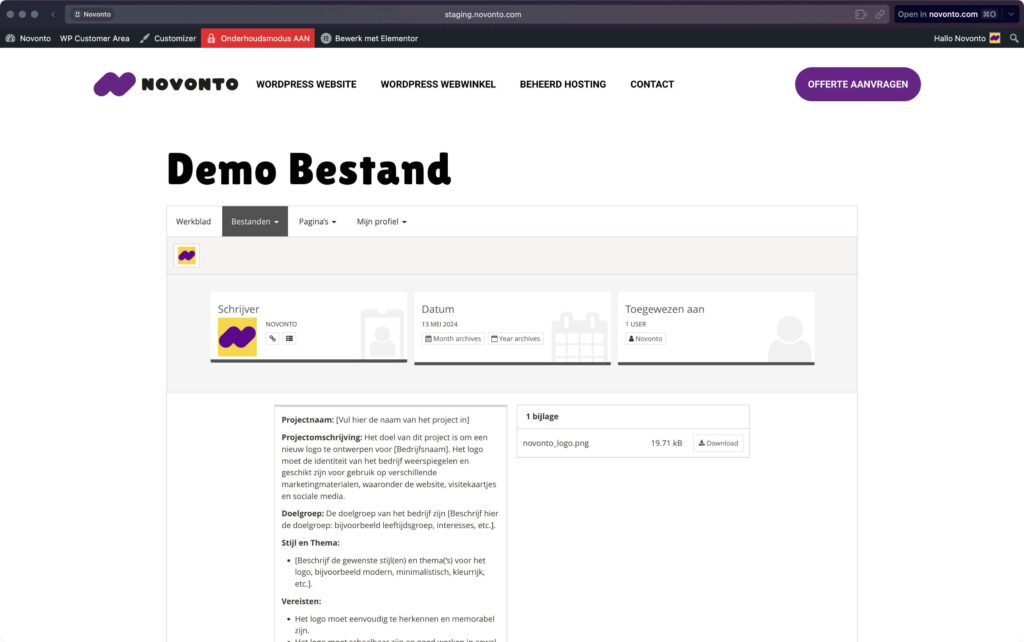
Nice!
And here is the private page:
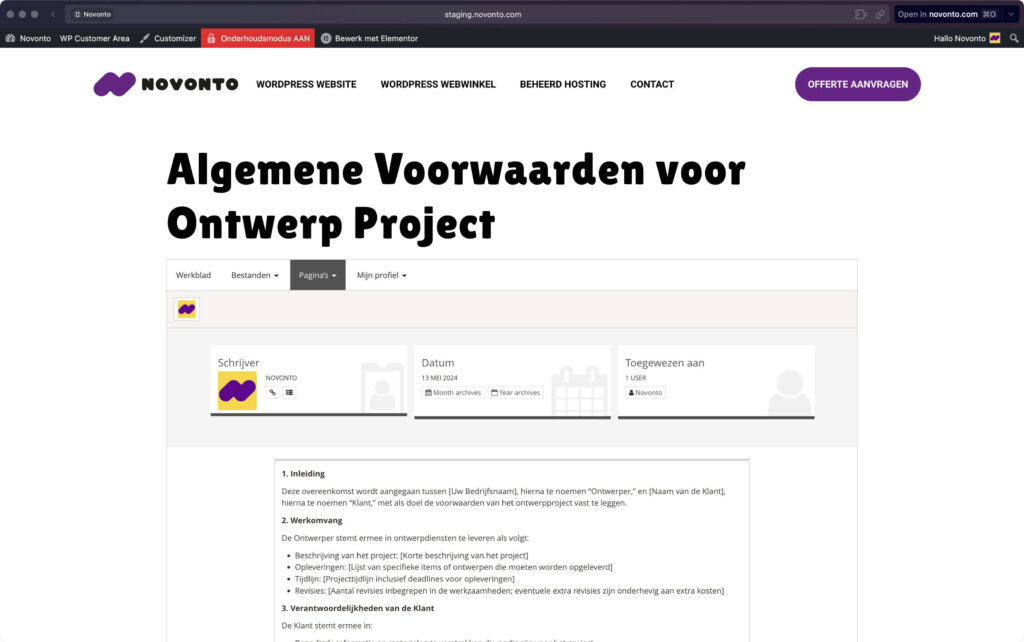
It’s great, right? 😎
In terms of looks, it’s not the best. But it looks professional enough, does what it’s supposed to do and, above all, costs you nothing.
You can always manually design the portal with code. There are also paid add-ons that you can buy on the website of the plugin.
Free Options
WP Customer Area
This is the plugin we used above.
WP Customer Area is a modular all-in-one plugin To manage private content on your WordPress site.
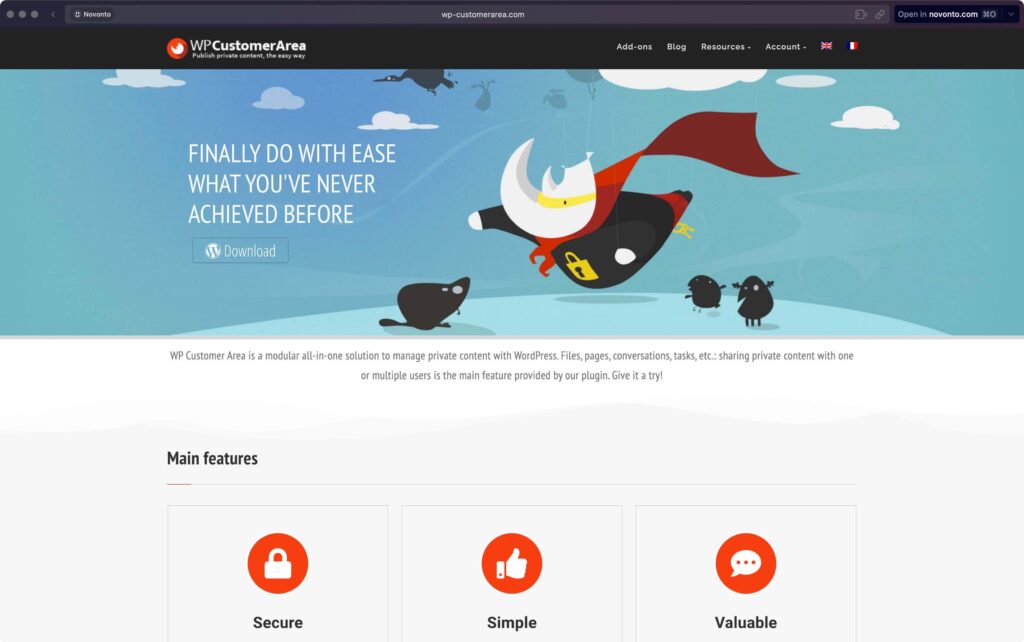
💻 Key features
- Private pages and files: Create private areas for each registered user, where you can share documents, contracts or any other type of file
- Custom message types: Supports custom message types, offering more flexibility in the type of content you can share
- User roles and permissions: You can set custom permissions for different user roles, which determine what they can see or do within the portal
- Shortcodes: Contains a variety of shortcodes that can be used to customize the layout and functionalities
- Extensions: Offers several free and paid extensions to add features such as advanced custom fields, conversations or project management tools
👍 Advantages
- Highly customizable: The plugin’s modularity and support for custom message types mean you can customize it to meet your specific needs
- Safe: Provides robust security features, including the ability to set detailed permissions for each user role
- Scalable: As your business grows, you can easily add more features with the plugin’s extensions
👎 Cons
- Learning curve: With the multitude of features, the plugin can be somewhat overwhelming for WordPress beginners
- Limited support: As a free plugin, support options are limited, which can be a problem if you encounter problems
Client Portal – Private user pages
This plugin allows you to create a safe area create where each registered customer has a private page.
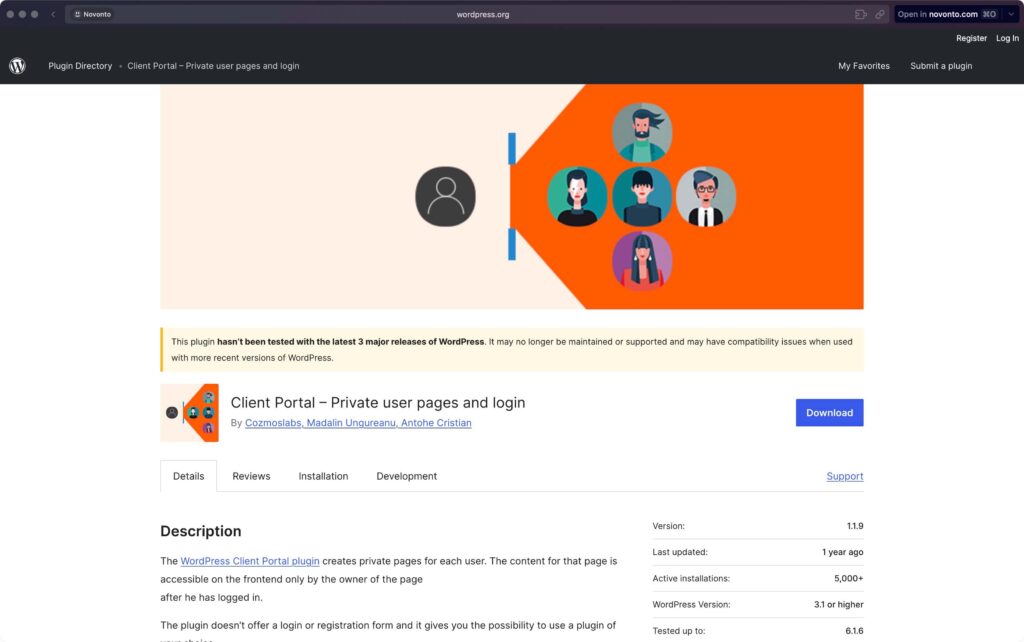
💻 Key features
- Private user pages: Create individual private pages for each client, where you can upload files or add custom content
- Shortcodes: Use the plugin’s shortcode on any page where users are redirected to their private page
- Basic file management: Allows easy uploads and downloads of files within each client’s private page
👍 Advantages
- Ease of use: Very user-friendly, requires little to no programming knowledge – this makes it a great option for WordPress beginners
- Quick installation: You can have your customer portal up and running within minutes, thanks to the plugin’s simple settings
👎 Cons
- Limited functions: While the plugin covers basic functionalities such as private pages and login forms, it lacks advanced features such as project management tools or detailed user rights.
- Basic design: The visual elements such as login and registration forms are fairly basic, with limited options for customization.
Paid options
There are some premium plugins you can use to create a more comprehensive customer portal experience for your customers.
Here are some of the plugins you can use:
1. SuiteDash
SuiteDash is a premium, cloud-based platform that integrates a wide range of business tools into a single dashboard.
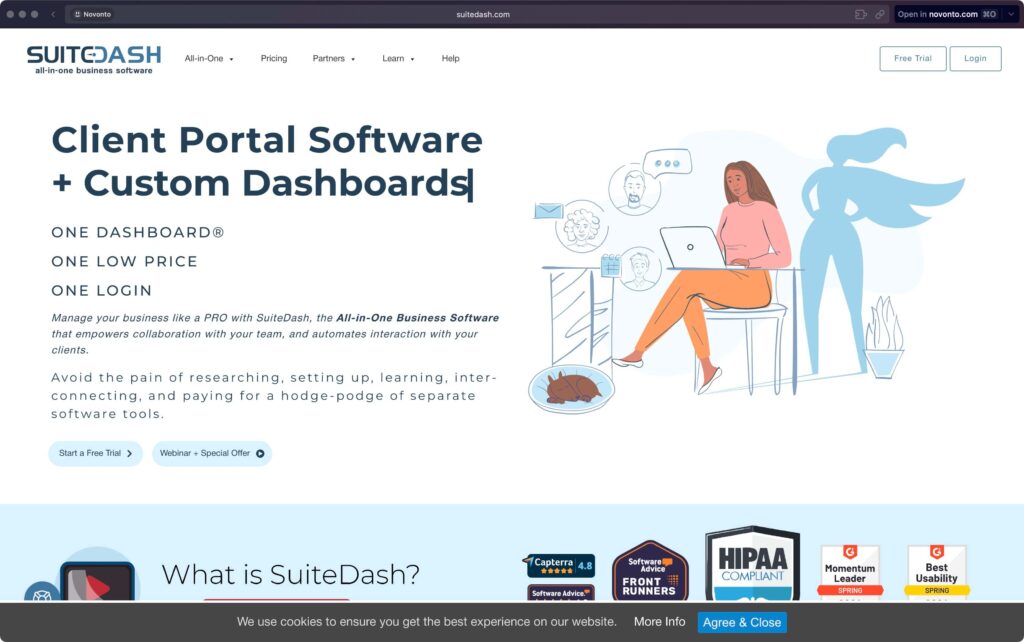
From customer communications to project tracking and billing, SuiteDash strives to eliminate the need for multiple software solutions.
Its compatibility with WordPress makes it a attractive option For those who already use the platform for their websites.
💻 Key features
- Integrated CRM: Manage detailed customer profiles, manage communications and even automate follow-ups
- Project Management: Comprehensive tools for task assignment, timelines and progress monitoring
- File sharing: Securely share files with specific clients and teams
- Billing and payments: Create, send and manage invoices directly from the SuiteDash interface, and accept payments via integrated gateways
- Custom branding: Customize the appearance of your customer portal to match the look and feel of your brand
- Collaboration tools: Features such as chat, discussion boards and internal emails promote seamless communication within teams and with customers
👍 Advantages
- Fully integrated: Combines multiple business tools into one platform, reducing the need for separate software solutions.
- Adaptation: Provides extensive customization options, both in terms of functionality and appearance.
- Time-saving automation: Features such as automated billing and customer follow-up can save you valuable time.
👎 Cons
- Cost: This is a premium product with a corresponding pricing model, which can be a disadvantage for small businesses or freelancers on a tight budget.
- Learning curve: With the extensive features, it may take some time to learn how to use SuiteDash effectively.
💰 Prices
SuiteDash offers different pricing plans to meet different needs.
- The starting price is $19/month for their basic plan, which includes core functionalities but limits the number of clients and projects.
- Plans in higher categories with more features and fewer restrictions can amount to $99/month.
What is great about their pricing is that SuiteDash does not enforce contracts, which significantly reduces risk.
2. MemberPress
MemberPress is a user-friendly WordPress plugin designed to provide membership-based websites create.
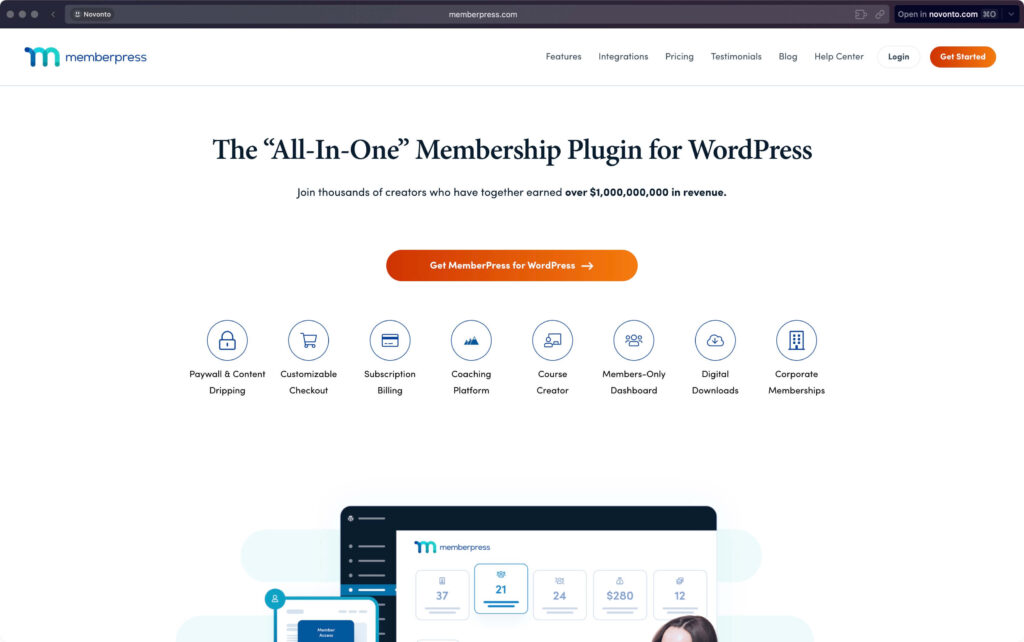
It allows you to restrict access to content based on membership levels, making it an excellent choice for a customer portal where different levels of access may be required.
It is highly valued because of its ease of use and seamless integration with various external services.
💻 Key features
- Content limitation: Easily restrict access to content, files or entire pages based on the user’s membership level or subscription status.
- Subscription Management: Automate the subscription process, including payments, renewals and reminders.
- Customizable access rules: Create complex access rules that can be tailored to individual customers or specific groups.
- Reporting and analysis: Track membership statistics, subscription revenue and other essential metrics directly from the dashboard.
- Seamless integrations: Integrates well with various email marketing services, payment gateways and even external plugins to extend functionality.
👍 Advantages
- Flexibility: Highly customizable, allowing you to create a customer portal that fits your business model perfectly.
- Ease of use: Makes it easy to set up and manage your customer portal, even for WordPress beginners.
👎 Cons
- Cost: This is a premium plugin and costs can add up, especially if you opt for add-ons or higher subscription plans.
- Limited CRM features: While MemberPress excels in content restriction and membership management, it lacks some CRM features such as customer profiling or in-depth communication tools.
💰 Prices
MemberPress offers multiple pricing plans:
- The basic plan begins at $179.50/year, including the core functions of the plugin and access to basic add-ons.
- More advanced plans offer additional features and add-ons, with prices up to $399.50/year.
3. Restrict Content Pro
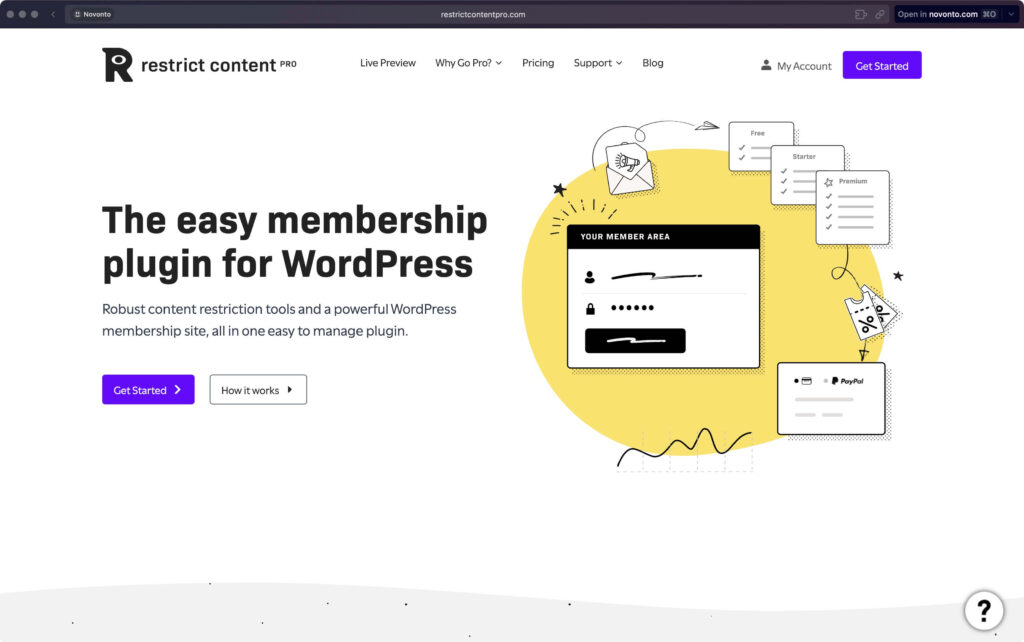
The main function of Restrict Content Pro is to give you the opportunity to Limit access to content and create different subscription levels.id te bieden om toegang tot inhoud te beperken en verschillende abonnementsniveaus te creëren.
💻 Key features
- Content limitation: Easily restrict specific pages, posts or even sections of content based on membership levels or customer-specific settings.
- Multiple membership levels: Create multiple subscription levels, each with its own set of access rules.
- Payment gateways: Integrates seamlessly with a variety of payment gateways such as PayPal, Stripe and others for easy billing.
- Customer Dashboard: Provide customers with an intuitive dashboard where they can manage their accounts, view subscribed content and handle billing.
- Reporting and analysis: Access comprehensive reports on revenue, membership levels and more.
👍 Advantages
- Highly customizable: With a range of add-ons and customization options, you can tailor Restrict Content Pro to the specific needs of your customer portal.
- Intuitive user interface: Known for its simple and easy-to-navigate administration interface, making it accessible even to WordPress beginners.
👎 Cons
- Limited built-in functions: While it excels in content restriction and subscription management, it lacks some advanced features for customer portals.
💰 Prices
Restrict Content Pro has several pricing options available:
- Starting with the lowest plan for $99/year, which covers the basic functions and support for one site.
- Higher plans, such as the unlimited plan for $249/year, include additional features and support for multiple sites.
Benefits of Paid Options
Although free options for WordPress customer portals offer basic functionality and are great for small businesses or freelancers on a limited budget:
Do paid options offer a range of benefits that can be very beneficial to your business in the long run.
These premium solutions come with advanced features, better security and dedicated support, among other benefits.
Here is a summary of some of the key benefits that make paid options worth considering:
| Advantage | Description |
|---|---|
| Advanced Features | Access to project management tools, advanced file sharing and customizable dashboards. |
| Enhanced Security | Higher levels of encryption, two-factor authentication and regular security updates. |
| Dedicated Support | Access to customer service and technical support, often available 24/7. |
| Scalability | Easily expand features and user capacity as your business grows. |
| Adaptation | More options to customize the look and functionality of the portal to fit your brand. |
| Integration | Seamless integration with other business tools such as CRM software, payment gateways and email marketing platforms. |
Choosing a paid customer portal solution may require an initial investment, but the range of advanced features and benefits often makes this a wise long-term decision.
create wordpress customer portal
Developing a secure and efficient client portal on your WordPress website is a strategic move that offers numerous benefits. Such a portal can significantly improve the way you communicate with clients, strengthen the security of sensitive information and increase trust between you and your clients.
Comprehensive Benefits of a Customer Portal
- Streamlining Interactions: A customer portal allows all communications and transactions with customers to be managed in one central location. This eliminates the need for multiple communication channels such as emails and phone calls, which can often lead to confusion and delays. Customers can view their data, receive updates, and respond directly within the portal.
- Increased Security: A customer portal is equipped with advanced security measures such as SSL encryption, two-factor authentication, and regular security audits. These features help ensure the protection of sensitive information and provide a secure environment for both business operations and customer data.
- Building Confidence: Providing a professional and secure platform that customers can trust for their transactions and communications builds credibility as a business. Customers feel more at ease when they know their data is secure and that they can easily access the information they need.
Conclusion
Regardless of the route you choose, an effectively implemented customer portal can significantly improve customer satisfaction and promote efficiency within your organization. This leads to a win-win situation for both your company and your customers, who benefit from a user-friendly and secure interface for their interactions with your company.

